WordPressテーマ「THE THOR」には、目次機能が備わっています。
標準で目次を使用できるので、プラグインの導入数を減らすことができます。
しかし、標準の目次は・・・、
かなり地味です。笑
目次だからいいや、と割り切れる方であればいいですが、サイトのデザインにこだわる方であれば、不似合いに感じるかもしれません。
実際に私もそうでした。笑
ということで、今回は「THE THOR」の簡単な設定方法と、コピペでも使用できるカスタマイズ7選をご紹介します。
目次
「THE THOR」の目次設定方法
「THE THOR」の目次の設定方法は至って簡単で、ダッシュボードのカスタマイズ画面だけで完結します。
まずは、標準の目次の設定方法をご紹介します。
- STEP 1
- STEP 2
- STEP 3
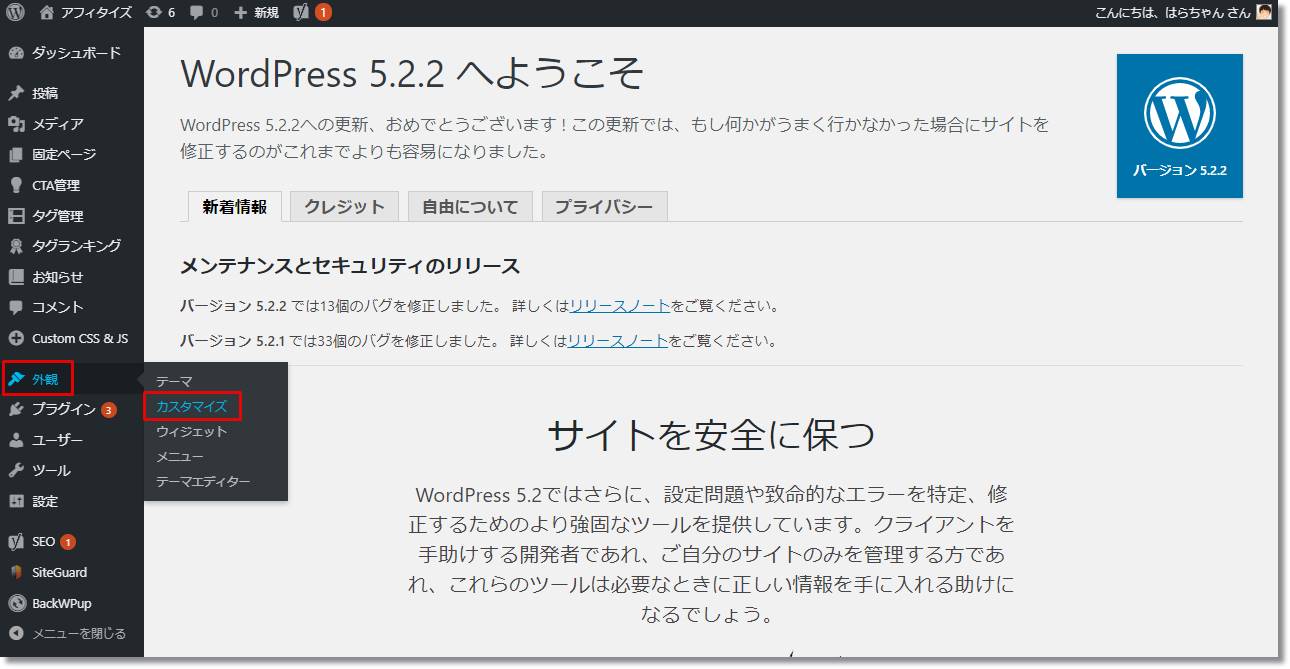
WordPressのダッシュボード画面から、「外観 > カスタマイズ」とクリックします。
- STEP 1
- STEP 2
- STEP 3
次に、カスタマイズ画面から「投稿ページ設定 > 目次設定」をクリックします。
目次の設定画面が表示されますので、お好みに合わせて変更していきます。
- 目次を表示するための最小見出し数を指定
いくつ見出しを配置したら目次を表示するか指定します。 - 目次に表示する見出しのレベルを指定
どのレベルの見出しまで目次に表示するか設定する項目で、レベル3の場合、h3タグの見出しまで目次に表示されます。
- STEP 1
- STEP 2
- STEP 3
設定した目次は、下記画像のように表示されます。
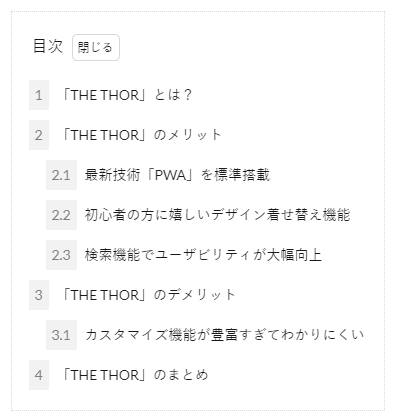
かなりもっさくて、地味な目次になっていますね・・・。笑
ここからは、このもっさい目次のカスタマイズ方法をご紹介していきます。
「THE THOR」のCSS追記手順
さて、今回の目次のカスタマイズですが、ダッシュボードのカスタマイズ項目から行うのではなく、CSSを追記して行います。
その追記手順ですが、
- STEP 1
- STEP 2
WordPressのダッシュボード画面から、「外観 > カスタマイズ」とクリックします。

- STEP 1
- STEP 2
画面下に「追加CSS」のカスタマイズ項目がありますので、こちらにこれからご紹介するCSSをコピペしてください。
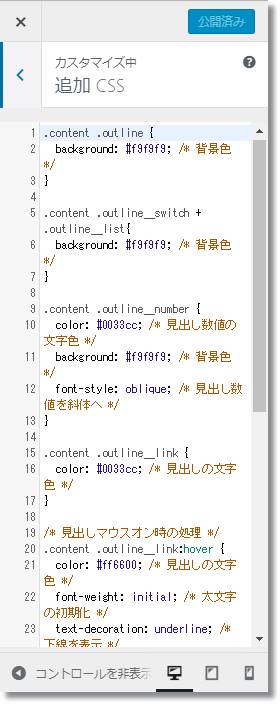
コピペしたCSSは画面右側に表示されているサイトに即時で反映されますので、結果を確認しながらコピペすることができます。
「THE THOR」の目次カスタマイズ7選
CSSの追記方法をご紹介したところで、次にコピペで使用できる、目次のカスタマイズCSSをご紹介していきます。
今回は7つの目次デザインをご用意しました。
お好みに合わせてご利用くださいね。
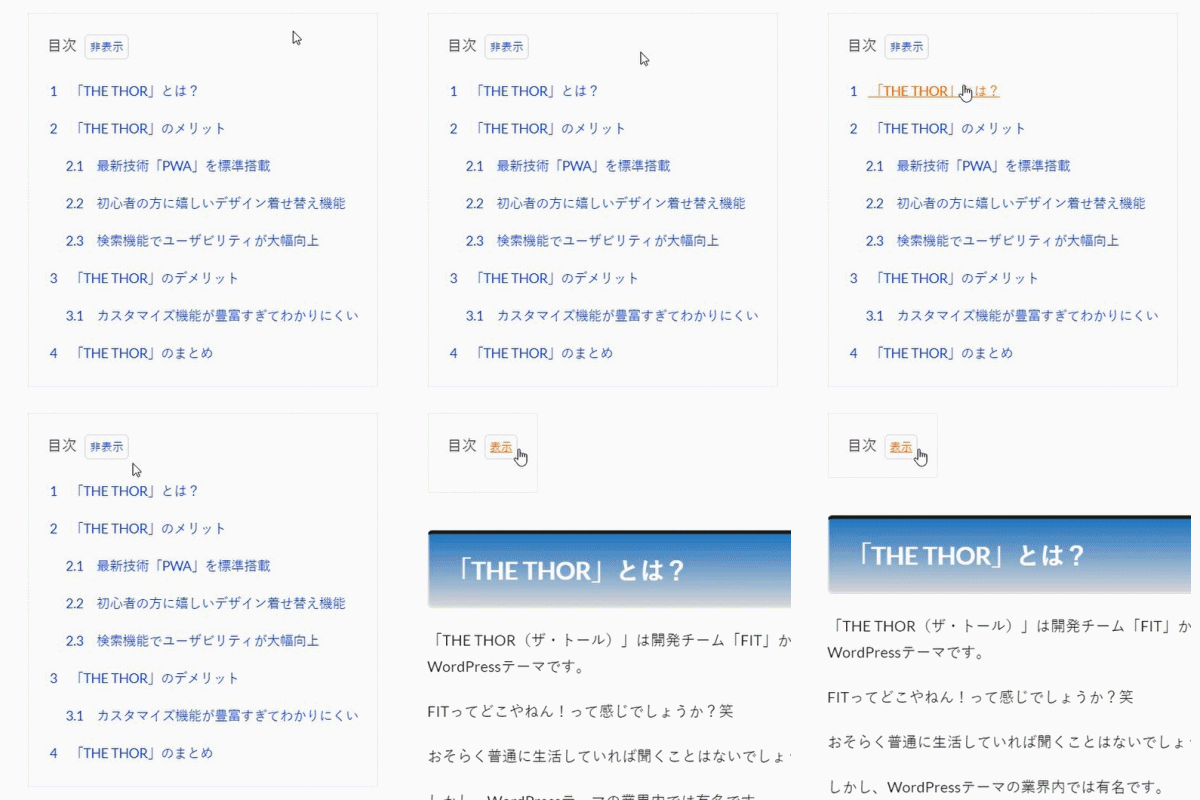
シンプルなデザインの目次
まずはシンプルなデザインからです。
こちらは有名なWordPressの目次作成プラグイン「Table of Contents Plus」の標準デザインを参考に作成しました。
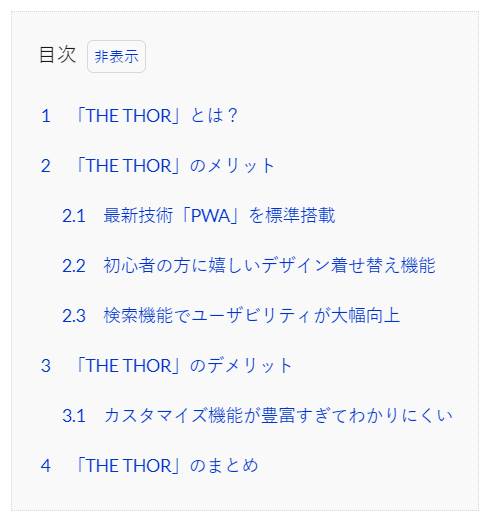
目次なので目立ちすぎず、それでいて、目次を使用したい方にリンクと分かりやすいよう各見出しを青色にしています。
迷ったらこの目次で間違いなしです!
.content .outline {
	background: #f9f9f9; /* 背景色 */
}

.content .outline__switch + .outline__list{
	background: #f9f9f9; /* 背景色 */
}

.content .outline__number {
	color: #0033cc; /* 見出し数値の文字色 */
	background: #f9f9f9; /* 背景色 */
}

.content .outline__link {
	color: #0033cc; /* 見出しの文字色 */
}

/* 見出しマウスオン時の処理 */
.content .outline__link:hover {
	color: #ff6600; /* 見出しの文字色 */
	font-weight: initial; /* 太文字の初期化 */
	text-decoration: underline; /* 下線を表示 */
}

.content .outline__toggle:checked + .outline__switch::before {
	content: "非表示"; /* 閉じるの文字を変更 */
}

.content .outline__switch::before {
	content: "表示"; /* 開くの文字を変更 */
	color: #0033cc; /* 非表示・表示の文字色 */
}

/* 非表示・表示マウスオン時の処理 */
.content .outline__switch:hover:before {
	color: #ff6600; /* 非表示・表示の文字色 */
	text-decoration: underline; /* 下線を表示 */
}
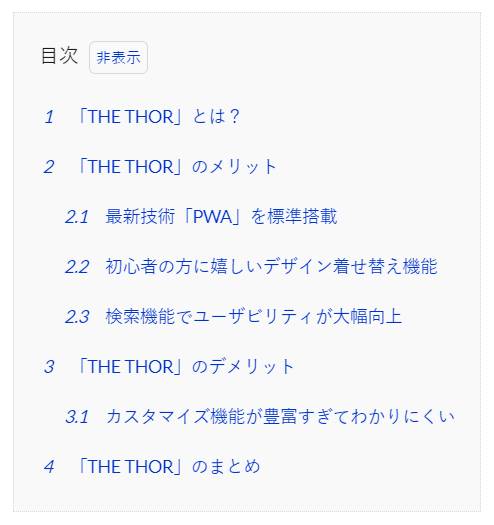
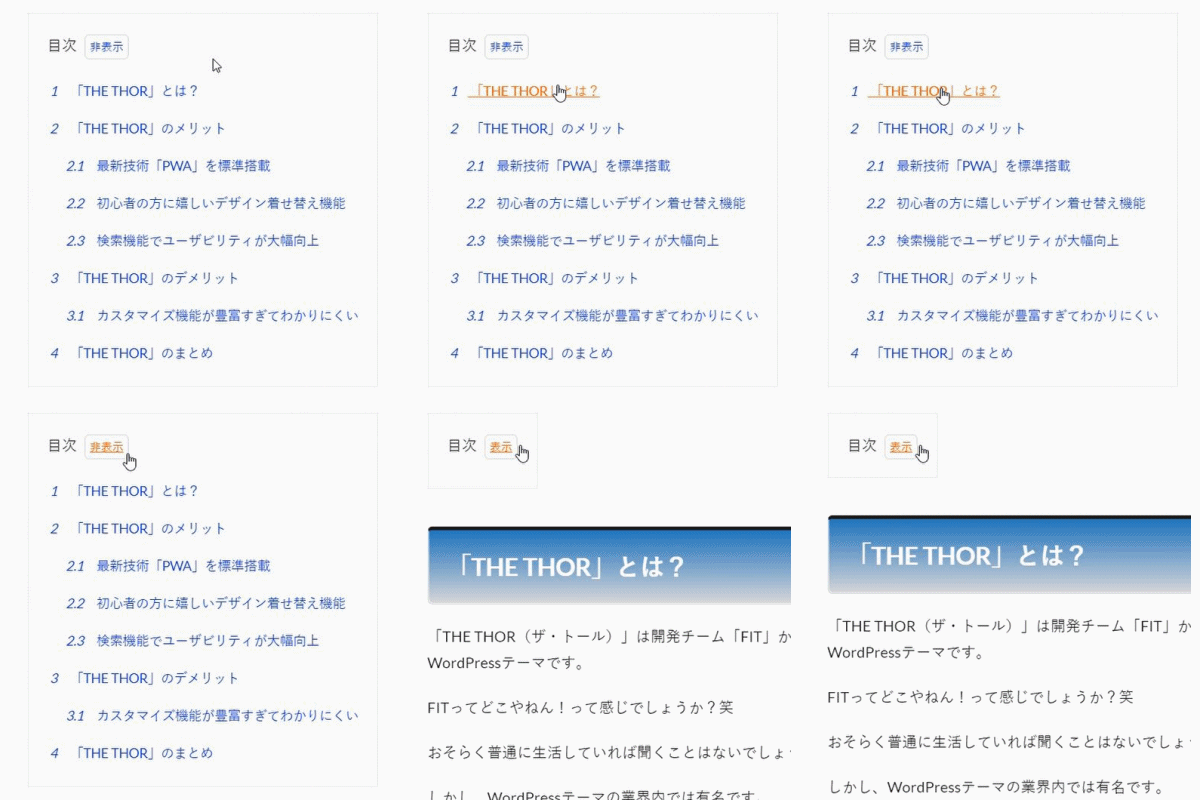
数値のみ斜体にした目次
目次の数値のみ斜体にしたデザインです。
ちょっとしたこだわりを出すことができますね。
.content .outline {
	background: #f9f9f9; /* 背景色 */
}

.content .outline__switch + .outline__list{
	background: #f9f9f9; /* 背景色 */
}

.content .outline__number {
	color: #0033cc; /* 見出し数値の文字色 */
	background: #f9f9f9; /* 背景色 */
	font-style: oblique; /* 見出し数値を斜体へ */
}

.content .outline__link {
	color: #0033cc; /* 見出しの文字色 */
}

/* 見出しマウスオン時の処理 */
.content .outline__link:hover {
	color: #ff6600; /* 見出しの文字色 */
	font-weight: initial; /* 太文字の初期化 */
	text-decoration: underline; /* 下線を表示 */
}

.content .outline__toggle:checked + .outline__switch::before {
	content: "非表示"; /* 閉じるの文字を変更 */
}

.content .outline__switch::before {
	content: "表示"; /* 開くの文字を変更 */
	color: #0033cc; /* 非表示・表示の文字色 */
}

/* 非表示・表示マウスオン時の処理 */
.content .outline__switch:hover:before {
	color: #ff6600; /* 非表示・表示の文字色 */
	text-decoration: underline; /* 下線を表示 */
}
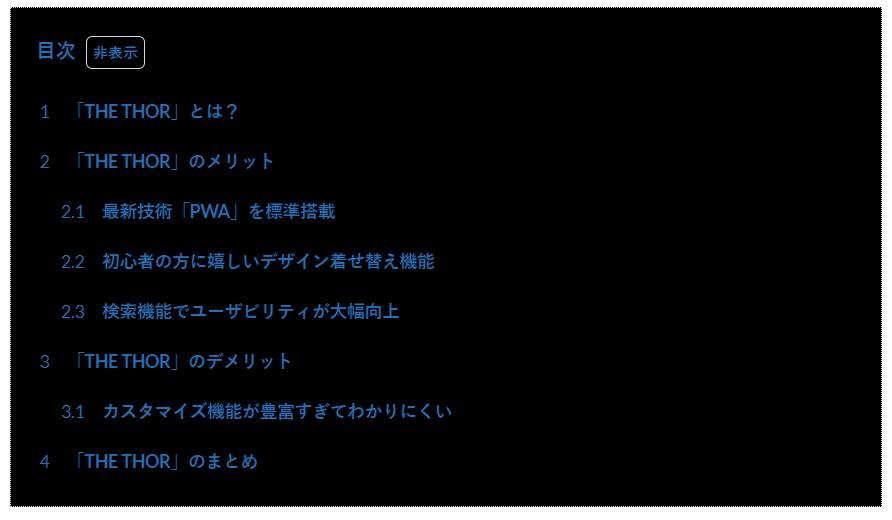
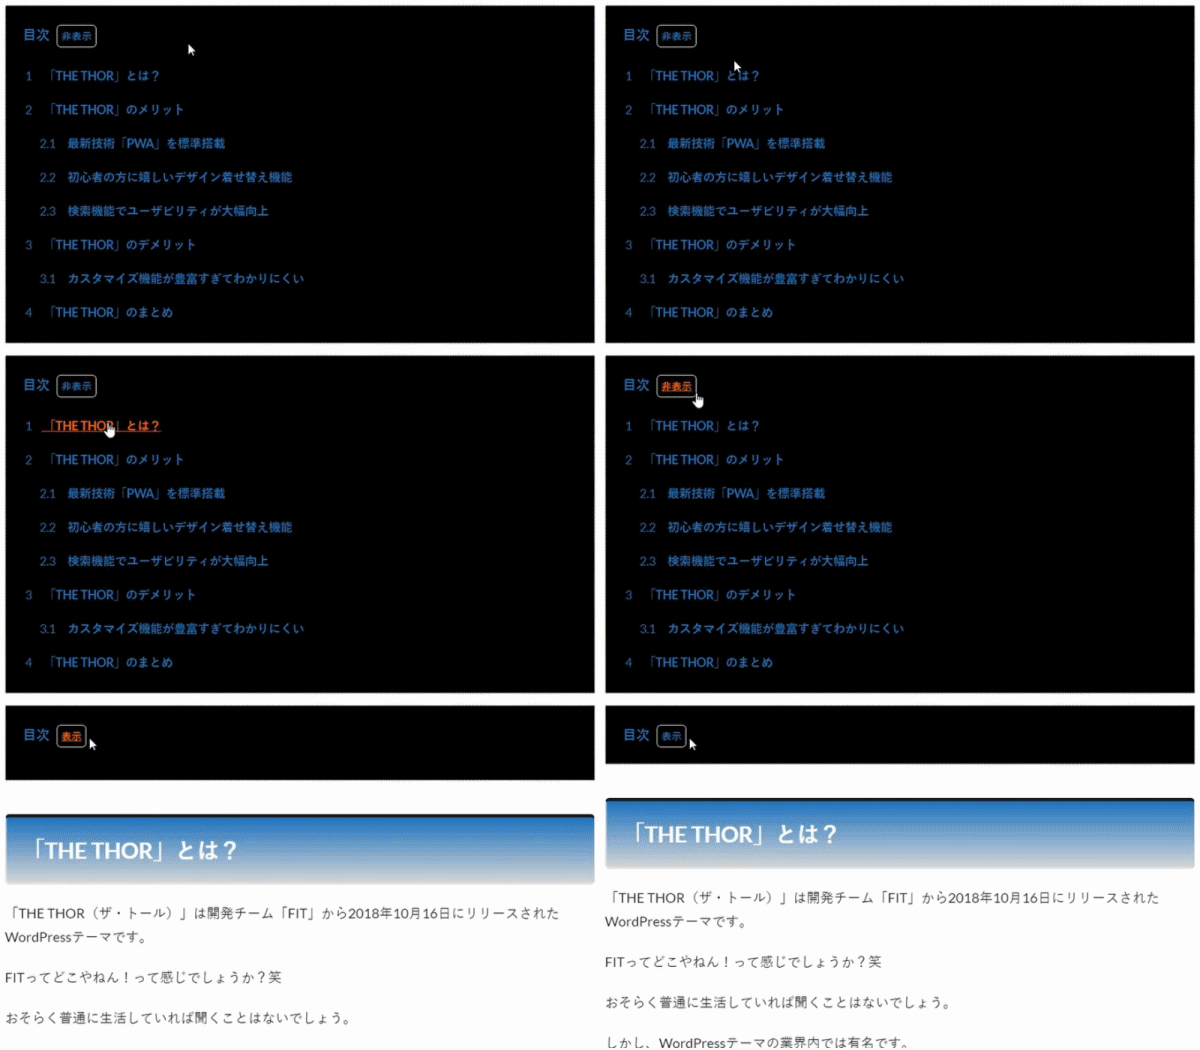
背景が黒で全幅表示した目次
背景を黒にし、ダークな感じの目次をご用意しました。
黒背景と青文字の色の対比で、ホラーな感じを出しているようです・・・。笑
.outline__title {
	color: #1e73be; /* 目次の文字色 */
	font-weight: bold; /* 太文字 */
}

.content .outline {
	width: 100%; /* 目次の幅を広げる */
	background: #000000; /* 背景色 */
}

.content .outline__switch + .outline__list{
	background: #000000; /* 背景色 */
}

.content .outline__number {
	color: #1e73be; /* 見出し数値の文字色 */
	background: #000000; /* 背景色 */

}

.content .outline__link {
	color: #1e73be; /* 見出しの文字色 */
	font-weight: bold; /* 太文字 */
}

/* 見出しマウスオン時の処理 */
.content .outline__link:hover {
	color: #ff6600; /* 見出しの文字色 */
	text-decoration: underline; /* 下線を表示 */
}

.content .outline__toggle:checked + .outline__switch::before {
	content: "非表示"; /* 閉じるの文字を変更 */
}

.content .outline__switch::before {
	content:"表示"; /* 開くの文字を変更 */
	color: #1e73be; /* 非表示・表示の文字色 */
	font-weight: bold; /* 太文字 */
}

/* 非表示・表示マウスオン時の処理 */
.content .outline__switch:hover:before {
	color: #ff6600; /* 非表示・表示の文字色 */
	text-decoration: underline; /* 下線を表示 */
}
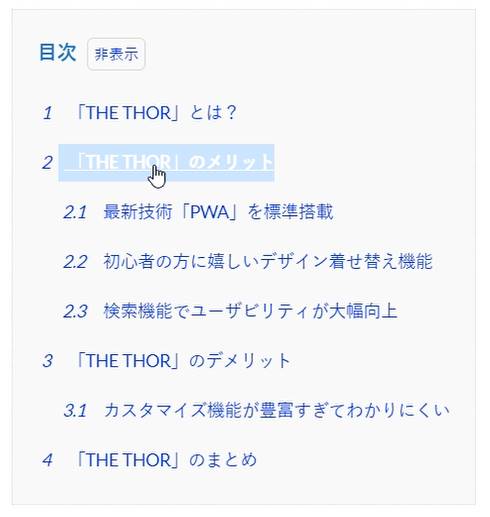
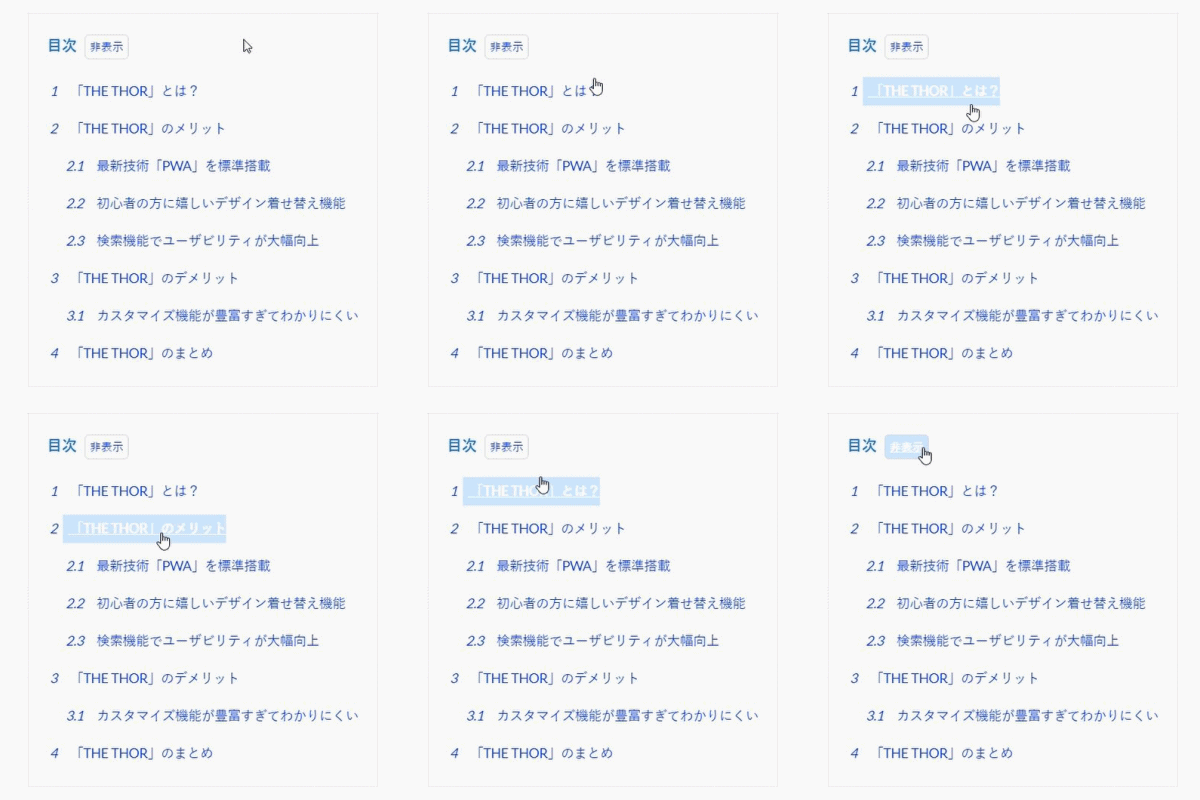
マウスオン時に行全体の色を変更する目次
マウスオン時に行自体の色を変更させる目次です。
どの位置にマウスが重なっているかよりわかりやすくしています。
.content .outline {
	background: #f9f9f9; /* 背景色 */
}

.outline__title {
	color: #1e73be; /* 目次の文字色 */
	font-weight: bold; /* 太文字 */
}

.content .outline__switch + .outline__list{
	background: #f9f9f9; /* 背景色 */
}

.content .outline__number {
	color: #0033cc; /* 見出し数値の文字色 */
	background: #f9f9f9; /* 背景色 */
	font-style: oblique; /* 見出し数値を斜体へ */
}

.content .outline__link {
	color: #0033cc; /* 見出しの文字色 */
}

/* 見出しマウスオン時の処理 */
.content .outline__link:hover {
	color: #ffffff; /* 見出しの文字色 */
	font-weight: initial; /* 太文字の初期化 */
	text-decoration: underline; /* 下線を表示 */
	background: #cce5ff; /* 背景色 */
	font-weight: bold; /* 太文字 */
}

.content .outline__toggle:checked + .outline__switch::before {
	content: "非表示"; /* 閉じるの文字を変更 */
}

.content .outline__switch::before {
	content: "表示"; /* 開くの文字を変更 */
	color: #0033cc; /* 非表示・表示の文字色 */
}

/* 非表示・表示マウスオン時の処理 */
.content .outline__switch:hover:before {
	color: #ffffff; /* 非表示・表示の文字色 */
	text-decoration: underline; /* 下線を表示 */
	background: #cce5ff; /* 背景色 */
	font-weight: bold; /* 太文字 */
}
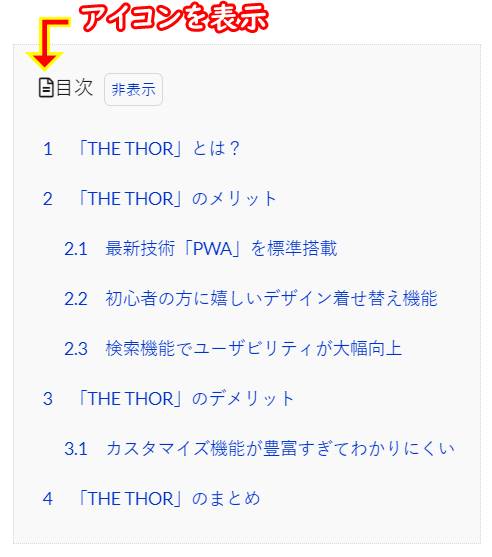
アイコンを使用した目次
「Table of Contents Plus」のプラグインでもそうですが、目次の文字の隣にアイコンを表示しているものが多いです。
こちらはFontAwesomeというアイコンフォントを使用することで、下記の通り実現可能です。
.content .outline {
	background: #f9f9f9; /* 背景色 */
}

.content .outline__switch + .outline__list{
	background: #f9f9f9; /* 背景色 */
}

.content .outline__number {
	color: #0033cc; /* 見出し数値の文字色 */
	background: #f9f9f9; /* 背景色 */
}

.content .outline__link {
	color: #0033cc; /* 見出しの文字色 */
}

/* 見出しマウスオン時の処理 */
.content .outline__link:hover {
	color: #ff6600; /* 見出しの文字色 */
	font-weight: initial; /* 太文字の初期化 */
	text-decoration: underline; /* 下線を表示 */
}

.content .outline__toggle:checked + .outline__switch::before {
	content: "非表示"; /* 閉じるの文字を変更 */
}

.content .outline__switch::before {
	content: "表示"; /* 開くの文字を変更 */
	color: #0033cc; /* 非表示・表示の文字色 */
}

/* 非表示・表示マウスオン時の処理 */
.content .outline__switch:hover:before {
	color: #ff6600; /* 非表示・表示の文字色 */
	text-decoration: underline; /* 下線を表示 */
}

.outline__title:before {
	font-family: "Font Awesome 5 Free";
	content: '\f15c';  /*アイコンのコード */
}
FontAwesomeとは、Webアイコンフォントの1種で、その中でも1番の人気を誇っているアイコンです。
「Font Awesome」の詳細は、下記記事でご紹介しております。
よろしければご覧ください。
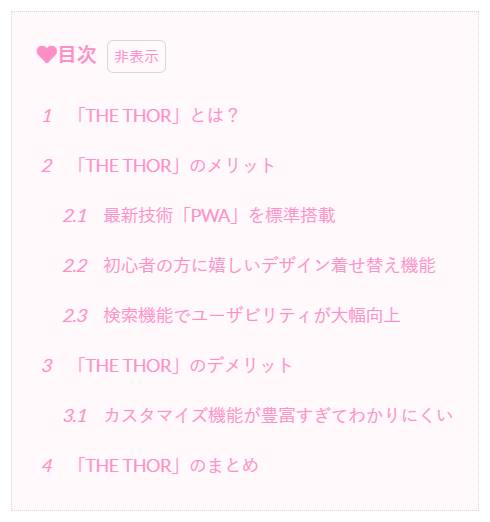
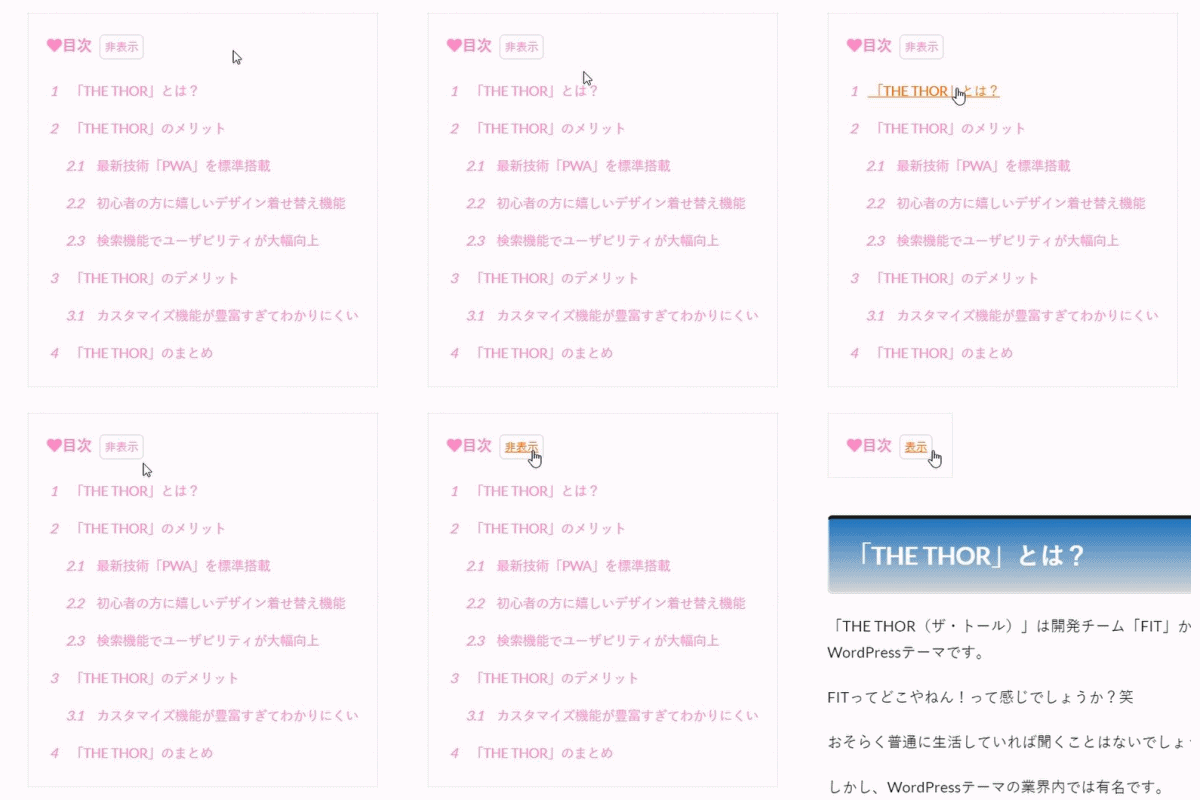
かわいいデザインの目次
女性らしいかわいい目次にしたい方に、下記のような目次をご用意しました。
アイコンには先述のFontAwesomeを使用しています。
.content .outline {
	background: #fff9fc; /* 背景色 */
}

.outline__title {
	color: #ff8ec6; /* 目次の文字色 */
	font-weight: bold; /* 太文字 */
}

.outline__title:before {
	font-family: "Font Awesome 5 Free";
    content: '\f004';  /*アイコンのコード */
}

.content .outline__switch + .outline__list{
	background: #fff9fc; /* 背景色 */
}

.content .outline__number {
	color: #ff8ec6; /* 見出し数値の文字色 */
	background: #fff9fc; /* 背景色 */
	font-style: oblique; /* 見出し数値を斜体へ */
}

.content .outline__link {
	color:#ff8ec6; /* 見出しの文字色 */
}

/* 見出しマウスオン時の処理 */
.content .outline__link:hover {
	color: #ff6600; /* 見出しの文字色 */
	font-weight: initial; /* 太文字の初期化 */
	text-decoration: underline; /* 下線を表示 */
}

.content .outline__toggle:checked + .outline__switch::before {
	content: "非表示"; /* 閉じるの文字を変更 */
}

.content .outline__switch::before {
	content: "表示"; /* 開くの文字を変更 */
	color: #ff8ec6; /* 非表示・表示の文字色 */
}

/* 非表示・表示マウスオン時の処理 */
.content .outline__switch:hover:before {
	color: #ff6600; /* 非表示・表示の文字色 */
	text-decoration: underline; /* 下線を表示 */
}
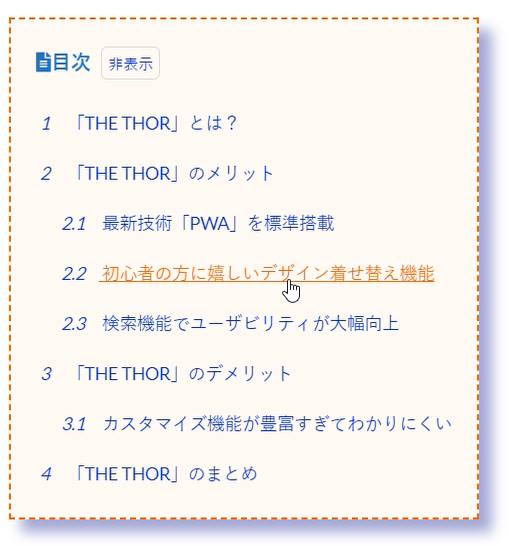
枠線を破線・影を付けた目次
さらにカスタマイズを加え、目次の枠線を破線に変更、そして目次に影を付けてみました。
他のサイトにないような独自性のある目次にしたい方には、ぜひおすすめしたい目次です。
.content .outline {
	background: #fff9f4; /* 背景色 */
	box-shadow: 10px 10px 10px #a4a8d4; /* 影を付ける */
	border: dashed 1.5px #ff6600; /* 枠線を破線へ */
}

.outline__title {
	color: #1e73be; /* 目次の文字色 */
	font-weight: bold; /* 太文字 */
}

.outline__title:before {
	font-family: "Font Awesome 5 Free";
	content: '\f15c';  /*アイコンのコード */
}

.content .outline__switch + .outline__list{
	background: #fff9f4; /* 背景色 */
}

.content .outline__number {
	color: #0033cc; /* 見出し数値の文字色 */
	background: #fff9f4; /* 背景色 */
	font-style: oblique; /* 見出し数値を斜体へ */
}

.content .outline__link {
	color: #0033cc; /* 見出しの文字色 */
}

/* 見出しマウスオン時の処理 */
.content .outline__link:hover {
	color: #ff6600; /* 見出しの文字色 */
	font-weight: initial; /* 太文字の初期化 */
	text-decoration: underline; /* 下線を表示 */
}

.content .outline__toggle:checked + .outline__switch::before {
	content: "非表示"; /* 閉じるの文字を変更 */
}

.content .outline__switch::before {
	content: "表示"; /* 開くの文字を変更 */
	color: #0033cc; /* 非表示・表示の文字色 */
}

/* 非表示・表示マウスオン時の処理 */
.content .outline__switch:hover:before {
	color: #ff6600; /* 非表示・表示の文字色 */
	text-decoration: underline; /* 下線を表示 */
}
「THE THOR」の目次カスタマイズまとめ
WordPressテーマ「THE THOR」の標準で備わっている目次を、カスタマイズする方法をご紹介しました。
ご紹介した目次は下記の通りです。
- シンプルなデザインの目次
- 数値のみ斜体にした目次
- 背景が黒で全幅表示した目次
- マウスオン時に行全体の色を変更する目次
- アイコンを使用した目次
- かわいいデザインの目次
- 枠線を破線・影を付けた目次
標準の目次は非常に簡易的なデザインになっています。
独自性のあるサイトを目指している方には、目次一つ取ってもデザインは重要です。

最後までお読み頂きありがとうございました。

